Showing posts with label Storybeader. Show all posts

Saturday, April 13, 2013

Treasury Thanks (March One)

I've been featured in lovely treasuries lately! Many thanks to the treasury makers! 


Bettie of  Collective Gathering featured my pastel rainbow silk velvet scrunchie 
in her very sweet collection Spring pastels.  (If you love pastels, you must visit this lovely treasury!)
Bettie makes lovely jewelry using highly polished natural gemstones, Swarovski crystals, and sterling and Tibet silver such as this lovely pearl and Swarovski necklace. Birthstone  and new Spring items are availbale.  "My OOAK designs are waiting for a new home!"


❁  ❁  ❁  ❁  ❁  ❁  ❁ 


Deb of storybeader featured my tie dyed pink swirl charity T shirt in her fun treasury white & color = tint ! 
Deb's shop is filled with wonderful paper items like this new to her shop set of 3 bookmarks.  She also offers hand-rolled paper beads, journals, art journals, and mixed media items.  "I love paper and I love books!  With each journal, you also get a haiku, written specifically for the piece, by the Storybeader!"


❁  ❁  ❁  ❁  ❁  ❁  ❁


Deb of storybeader also featured my "margarita" hand dyed silk scarf in her fun green treasury In honor of St. Patrick's Day.
Here are some of her handwrapped Florentine marbled paper
beads.  "When I went to Italy in May 2012, I found the shops of Florentine papermakers, Francesco Giannini and Gianni Parenti, called Il Papiro. The gentleman at one of the shops asked me if I would like to see how they hand marbled their papers. I was thrilled."  She describes the paper making process in her listing.


❁  ❁  ❁  ❁  ❁  ❁  ❁


Another wonderful pastel treasury!  Jennifer of White Wave Originals featured my pastel rainbow silk scrunchie in her lovely treasury color me spring. 
Jennifer is a weaver who makes scarves, table runners, and rugs in various sizes like this one.


❁  ❁  ❁  ❁  ❁  ❁  ❁


Mary of Mary Hopkins Quilts featured my pastel rainbow silk scrunchie in her very pretty treasury Bunny's Pastel Basket.
"Welcome to my quilty world!  All my quilts and quilted items are made from cotton fabrics and Warm and Natural quilt batting. I machine quilt all my quilts, for greater durability."  Besides quilts, Mary has also added knitted items.  Above is a beautiful butterfly quilt.


❁  ❁  ❁  ❁  ❁  ❁  ❁


Spring is in the air is the lovely treasury curated by Cynthia of Antiquity Travelers.  she featured my "margarita" hand dyed silk scarf.
Cynthia makes a variety gorgeous jewelry inspired by her travels, using only gold and silver with a huge variety of semi precious stones, pearls, shells, and handmade beads.  "We hope you’ll like our broad and adventurous style in jewelry."  These earrings "feature a pretty ceramic porcelain in a soft green that I paired up with hand hammered 16g silver wire.  The swirls remind me of new ferns in the spring as the furls are just starting to unwind."


photos by each individual artist © 2011-2013  all rights reserved!

Tuesday, April 9, 2013

Treasury Thanks (February- Two)

I've been featured in lovely treasuries lately! Many thanks to the treasury makers! (All treasuries and items within the treasuries are clickable.)
And yes, I know February was a while ago.  I have a lot of catching up to do!

 
Linda of Linda B's Jewelry included my pastel rainbow silk velvet scrunchie in her very fun collection, Shapes.


Linda makes lovely jewelry--earrings, bracelets, and her very unique and popular wire beaded kippot.  "Making jewelry is my passion."  This pearl and crystal comb is a lovely example of her work!  
                            
                            ❁  ❁  ❁  ❁  ❁  ❁  ❁

Oksana of OP Style handmade featured my pastel rainbow silk velvet scrunchie in her pretty treasury it's a spring.   
Oksana makes handmade jewelry mostly from polymer clay, seed beads, glass, cords, or metal.  "I put whole my heart and soul in my creations and I believe that people who wear it will be really happy!"  Look at this wire wrapped and beaded golden flower necklace!

                     
                                    ❁  ❁  ❁  ❁  ❁  ❁  ❁

Deb of storybeader featured my bright  cotton rainbow scrunchie in her very colorful and cheery treasury going wild with color!
Deb's shop is filled with wonderful paper items like this bracelet kit of her hand rolled paper beads and copper beads.  She also offers journals, art journals, bookmarks (new!), and mixed media items.  "I love paper and I love books!  With each journal, you also get a haiku, written specifically for the piece, by the Storybeader!"

                                  ❁  ❁  ❁  ❁  ❁  ❁  ❁

Andrea Andrea Durham Designs of included my tie dye pink heart T Shirt in her treasury Do you LOVE what you do?.
Andrea's shop is filled with her fantastic jewelry!  Her copper work like this cuff bracelet is wonderful!  "In my studio you will discover art designs that represent a bohemian lifestyle and a fashion trend that is edgy, yet sophisticated. I am a dreamer, a whismical minded artist that finds beauty in the abstract, twisted, unfinished and unraveled fabrics of the earth."

                                ❁  ❁  ❁  ❁  ❁  ❁  ❁

Rose of Random Creative featured my hand dyed silk scarf Margarita in her treasury Hello, green! featuring lovely shades of green. 
Rose makes wonderful beaded and button jewelry!  I love these colorful button earrings!  "I make a variety of handmade jewelry including unique, colorful, and fun bracelets, bangles, pendants, and earrings using beads and buttons. I use a variety of beadweaving techniques. I have a few beading PDF patterns of my own designs available."

                                 ❁  ❁  ❁  ❁  ❁  ❁  ❁

Rose also curated this lovely treasury, Soft Spring in Pink and Green!  
Here's another favorite with Spring leaves in her rock garden series--a beaded bracelet using a a right angle weave technique.  "The rock garden design came into existence because I wanted to create a design that was similar to the full, vivid nature of my leafy design, but more delicate."


photos by each individual artist © 2011-2013  all rights reserved! 

Tuesday, February 5, 2013

Ruffle Scarf: a Challenge!


My Blogging Business Artisans team loves Challenges!  That's why we post one every month--to stretch and grow us, to discover new territory.   


January's Challenge is posed to us by Deb of storybeader:
"Set aside time to work on and complete a new technique that you admire. It can be within your field of expertise, but doesn't have to be. Blog about your project at least once during the month or make a video, if you want."  

 a pile of 3 separate scarves I've made

I've been interested in knitting the new, popular ruffled scarves.  I do knit--but just barely.  So the process of basic knitting is not new to me.  This new material is however.  I also had to discover the best techniques.  My friend Virginia got me started.  I searched online and then made my own directions.  


The material is a yarn made of netting that is about 4 inches wide.  So far, I've used only Sashay brand yarn.  It comes in varigated shades of one color or several coordinating colors.

MATERIALS:
1 skein of fishnet type yarn
knitting needles  (The holes are large so a range of sizes work.  I used US size 7.) 

PROCESS:
1.  The yarn needs to be stretched for easier handling.  In my opinion, the knitting goes more smoothly when this is done ahead of time.  Virginia suggested wrapping the yarn around a book.  I did this at first, but found it less cumbersome to wrap around a towel or another skein of yarn.
This opens up the yarn and makes finding the holes to be knitted in easier.
   
2.  Fold back about 1 inch of the fishnet yarn.  (The fold faces away from you, although I'm not sure this matters.) 
 
3.  Stick needle in a loop very close to thick edge through the front of the loop.

4.  Stick needle in a loop very close to thin edge through the front of the loop.  

5.  These loops (#3 and #4 above) become the first ONE cast on.
the first loop


6.  Cast on as many loops as you like—8 is a good number.  Virginia likes to cast on 6 since it makes a longer scarf.  I like the greater fullness of 8.  You could cast on more for a shorter, fuller scarf.
Cast on by sticking the needle through the back of each consecutive loop.

This video shows you how!


7.  Knit.  
   a.  Put the needle through the next loop and yarn over with a loop from the feeding yarn.
   b.  Skip a loop and knit the next loop.  
See how the large loops are connected by a "ladder"--2 parallel threads close together?  The loop marked "this loop" is the one to use in yarning over.  The loop before it is skipped.

   c.  Knit till you come to that "mess" that was the first loop.  Knit it altogether as ONE loop.
beginning to knit the "mess"
ready to push the "mess" off after knitting it

   d.  Turn the work to begin knitting the next row.  There should be some raw edge that needs tidying.  Stick the needle with all the loops on it into one or two loops on that raw edge.  That new "mess" along with the first loop on the needle becomes the first loop to knit.  Knit it yarning over with a loop from the feeding yarn.
   e.  Skip a loop and knit into the next loop to the end of the row.
   f.  Turn and knit.  You can skip a loop or not when knitting the first loop of each row (I generally did not skip a loop.).  

8.  Cast off, leaving a tail long enough to weave through the scarf--at least 4 inches.  Pull the tail through the last loop.  When weaving the tail, use a large hole tapestry needle and pull the yarn through loops as close to the inside as possible.  
The tail has been fed through the loop but not yet pulled more snugly.
The tail has been pulled snugly.


LINKS:
1.  knitting a ruffle scarf (video). casting off at 2.0 minutes in.  I don't recommend finishing off with a knot at the end of the scarf.
2.  different method of casting on (video).  can see hands well.  However, he skips a loop when starting a new row.  You can skip or not skip, doesn't matter.  AND he says to knit in every loop without skipping.  I did this and the scarf does NOT ruffle.  I've added this link because his hands are very clear to watch.
3. a variation (video).  very wide and long with 2 skeins of fishnet and one of regular yarn.  Intersperse 2 rows of regular yarn in between each fishnet row.  When knitting with fishnet, be sure to skip every other loop to get the ruffle effect.


I've made 5 scarves now in various colors and am currently working on a 6th.  They're all gifts!

NOTE:  This yarn and this pattern are very forgiving!  Don't worry about mistakes such as not skipping a loop here and there or even dropping a stitch (simply make a new one!)  or having too many stitches (simply knit 2 together!).


Visit our BBA team blog to see more completed Challenges!

photos by me © 2012 and 2013

Wednesday, March 28, 2012

Treasury Round Up: Part One

I've been featured in lovely treasuries lately!  Many thanks to the treasury makers!
(All treasuries and items within the treasuries are clickable.)


Rae Ann Martin of Pink Posie Couture featured my bright rainbow tie dyed wash cloths in her colorful treasury Color Your World in Rainbow 


Rae Ann makes the most wonderful tutus and accessories.  Just look at this one! There's even more lovely goodies to be found in her shop.


Nancy of N Fallon Design Studio curated this treasury Dreams of warm weather and emerging spring! featuring my hand dyed silk scarf Rainbow Extravaganza. 


Nancy knits the most wonderful purses and other items like these these super cute heart brooches.


Deb of storybeader put together this collection called New From the BBArtisans featuring my windy dreams hand dyed silk scarf.


Deb makes lovely journals and paper beads like this Art Journal.  She especially loves washi paper.


Sarah of Magnolia Surprise made this festive treasury You're my blue sky, you're my sunny day... featuring my long sleeve rainbow tie dye T shirt for youth. 


Sarah is a talented crocheter who makes lovely items for her shop.  This fun toast potholder is a very popular item! 


Rose of Random Creative featured my silk scarf Wood Between the Worlds in her treasury Bring On the Spring Green.

Rose creates beautiful beaded bracelets and earrings.  She even makes her own patterns and has been featured in magazines!  She loves green and leaves and this pretty bracelet showcases those loves.


I'm linking up with Random Creative's Treasury Round Up.   For more awesome treasuries, go HERE!


photos by each individual artist © 2011-2012  all rights reserved!

Saturday, February 4, 2012

Fabulous Giveaway!

I love this new etsy team to which I belong!  Just look at this wonderful team giveaway happening in February!  Our inspiration is the "month of love."  We want to share with you, so come on over and enter.  Winner takes all!


This is my contribution ↓

a luxurious hand dyed silk velvet zipper pouch in vibrant red, lined with quilted silk.  Two hand crocheted (made by my friend Ginny Lee) flowers and a shell-pink button are sewn onto the front.  (5" x 3 ¼")


This giveaway is open world wide!  Enter now!
February's Giveaway -- Team Wide Love Event !
You have till February 21, 2012 at 11am central, but you don't want to wait!

photos by me and the individual shop owners © 2012   all rights reserved

Monday, January 30, 2012

New Mittens, Old Sweater! a challenge!

A new etsy team--Blogging Business Artisans--was launched last October. This team was formed to support and help its members grow artistically and professionally.  It's been a great joy to be a member of this team.

The idea was conceived of holding monthly challenges to help us grow and stretch our imaginations.  Team members must complete 6 of the 12 challenges within a year.
The first challenge is presented by Deb of storybeader and is called New Techniques.

"This first Challenge was set in motion because I'm always wanting to try new projects but stress about where to find the time?  So, BBA members are hereby given permission to set aside time to work on a new project you haven't tried before. It can be within your field of expertise, but doesn't have to be. This Challenge also asks members to blog about your New Technique at least once during the month of January and talk about your progress." 
Last year, I became interested in creating new items by cutting up and re-working old sweaters.  I began to collect mostly wool sweaters from thrift stores. I looked online and brought books home from the library.
 
Soon, I had a first project in mind-mittens.  I found the perfect sweater.
(sorry, I don't have a photo of the sweater before I cut it up.)  
The first thing I did was to felt it in my washing machine.  I added hot water and detergent.  I put the sweater in a zipping pillow case cover to control the errant pieces of felt fuzz.  After washing, I put the sweater (inside the pillow case) into the dryer on hot till dry.  There was no scientific method to this procedure.  I would take whatever I got.  What I got was a nice soft wool fabric. 
yes, that's me.
About this time, my friend Nancy Gamon, invited me to come to a "sweater chop shop" at her studio.  Four of us attended.  There was soon a mound of sweaters on her large work table.  We chopped and chopped and some of us sewed.
I made a paper pattern by drawing around my hand and added about ¼ inch for a seam allowance.  The pattern was pinned on the front of the sweater and through the back as well, wrong sides together, in order to incorporate the snowflakes.  The mittens were then cut out.
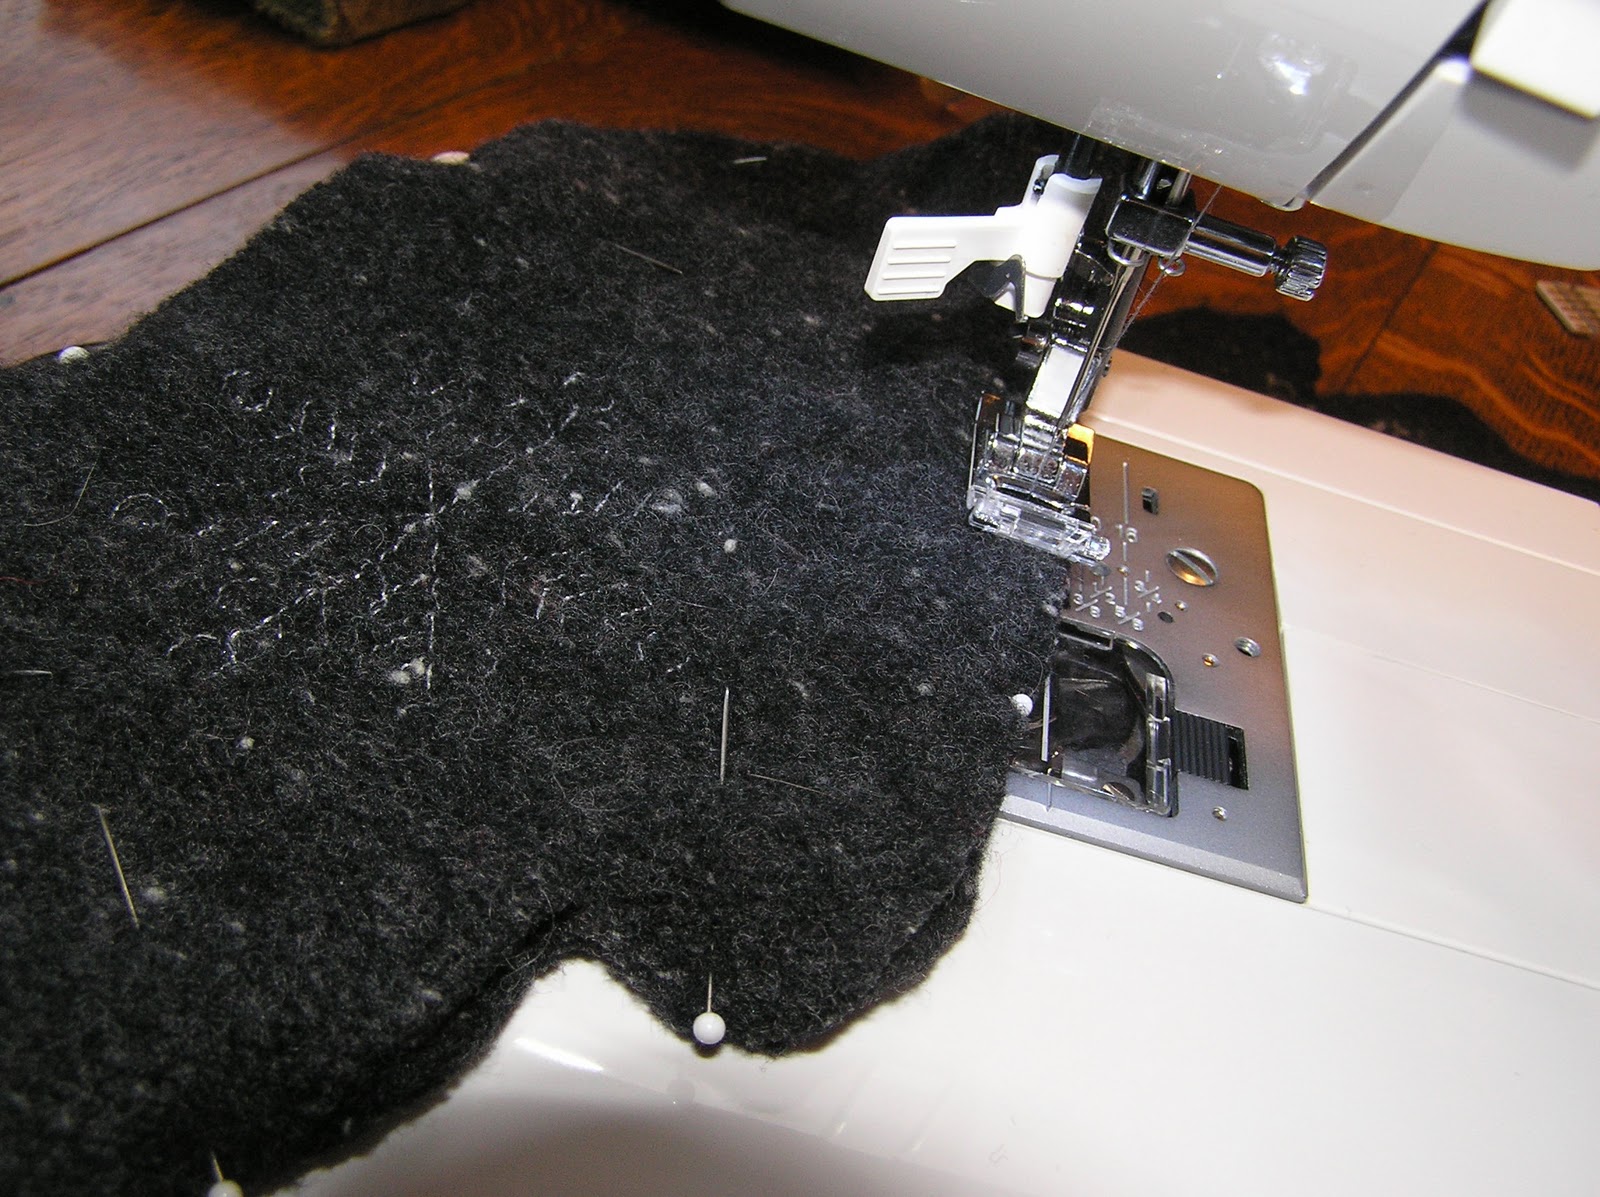
Now for the part I'd been temporarily avoiding.  I got out my new sewing machine (which I've barely used) and the manual. 
Directions were studied, the bobbin was threaded, mittens pinned, and I began to sew.
It was a little tricky sewing around the thumb.  For one thing the fabric is fluffy and dark.  I was able to mark a stopping point (at the base of the thumb) with a white marking pencil and that helped.  I'm not used to this new machine yet and the foot pedal is still a bit difficult for me.  Also, I've sewn extremely little in many years. 
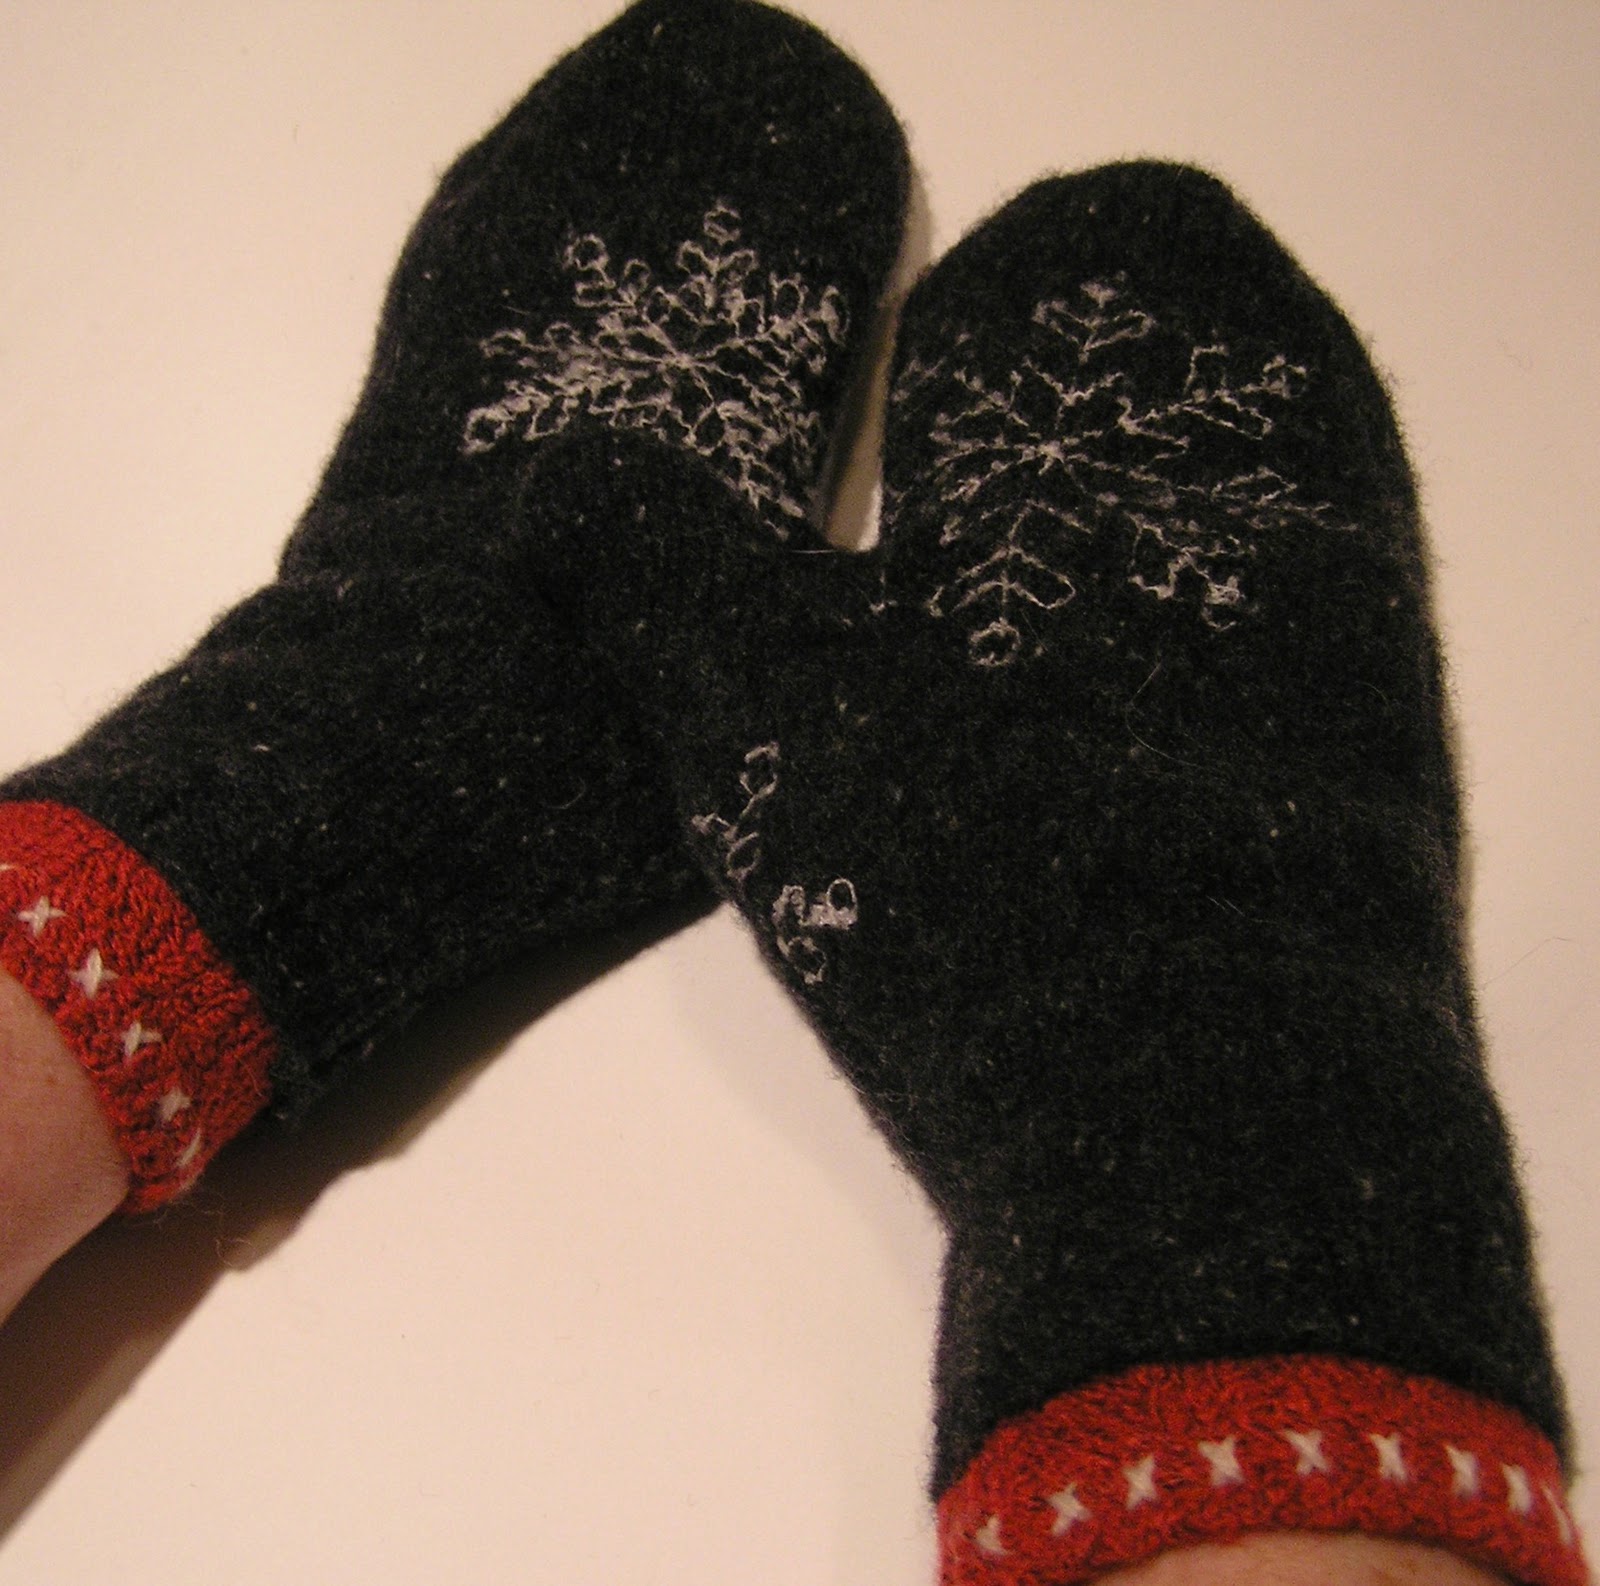
Next I wanted to add the red binding from the front of the sweater to the cuffs of the mittens.  I decided to hand sew this on because I didn't want any stitching showing.  Before adding this, the mittens had a nice finished cuff edge because this was the bottom of the (now former) sweater.  I wanted to preserve that.  I also machine sewed the raw edge a couple times to keep it from raveling.  (Was this red yarn wool?  hmmmm... The sweater tag said it was made of wool, so why is it so loose?  This is the unknown you get with a thrifted sweater.)
the finished mittens!  soft and warm!  (sorry for the bad photo)  

This was a challenge to complete.  There were definitely times when I was out of my comfort zone.  However, now I have some cute new mittens.  I would like to make a matching scarf.  I just have to think how to cut up the remaining sweater and how I'd like to put it together.  I'm dreaming of some other sweater projects as well!  (a pillow, knitting needle holder, more scarves, wine bottle bag.  I may make some flowers and add them to a sweater I have already.)

Intrigued by our team challenge?  Come on over to our BBA BLOG, and see what others have made!   

QUESTION:  Have you made anything lately which challenged you artistically?     

photos by me © 2012  all rights reserved